untung99.homes: How to Trace an Image in Illustrator
Untung99 menawarkan beragam permainan yang menarik, termasuk slot online, poker, roulette, blackjack, dan taruhan olahraga langsung. Dengan koleksi permainan yang lengkap dan terus diperbarui, pemain memiliki banyak pilihan untuk menjaga kegembiraan mereka. Selain itu, Untung99 juga menyediakan bonus dan promosi menarik yang meningkatkan peluang kemenangan dan memberikan nilai tambah kepada pemain.
Berikut adalah artikel atau berita tentang Harian untung99.homes dengan judul untung99.homes: How to Trace an Image in Illustrator yang telah tayang di untung99.homes terimakasih telah menyimak. Bila ada masukan atau komplain mengenai artikel berikut silahkan hubungi email kami di koresponden@untung99.homes, Terimakasih.
Wondering how to trace an image in Illustrator or how to trace in Adobe Illustrator for photos? Then you’re in the right place! In this Quick Tip tutorial, we’ll explore how to trace in Illustrator. We’ll use the Image Trace Tool in Illustrator to convert an image into a vector format. We’ll start by tracing a logo, and then we’ll move on to tracing a photo. Adobe Illustrator trace can do both.
What You Will Need
This tutorial uses the following assets to explore how to trace in Adobe Illustrator:
Use these assets to try out image trace in Illustrator, or try using raster files of your own. The process will be the same.
Want to Create a Quick Logo Without Software?
Want to create a logo easily and simply, without software? If you’re looking to create a logo or other project quickly, check out Placeit. It’s a browser-based tool with a ton of options. Placeit is a great tool for creating logos with a large assortment of assets to get your designs going. Try it out!


Follow along with us over on our Envato Tuts+ YouTube channel:
1. What Is “Image Trace”?
In Adobe Illustrator, tracing allows us to easily convert a raster image into a vector image. This means we could trace a photo or image in Illustrator to make it a vector. While it’s not always perfect, and you may sometimes need to make tweaks, use Illustrator to trace an image to vector as a quick and simple option.
Ready to give image trace in Illustrator a try? Let’s get started.
2. How to Use Image Trace in Illustrator
Step 1
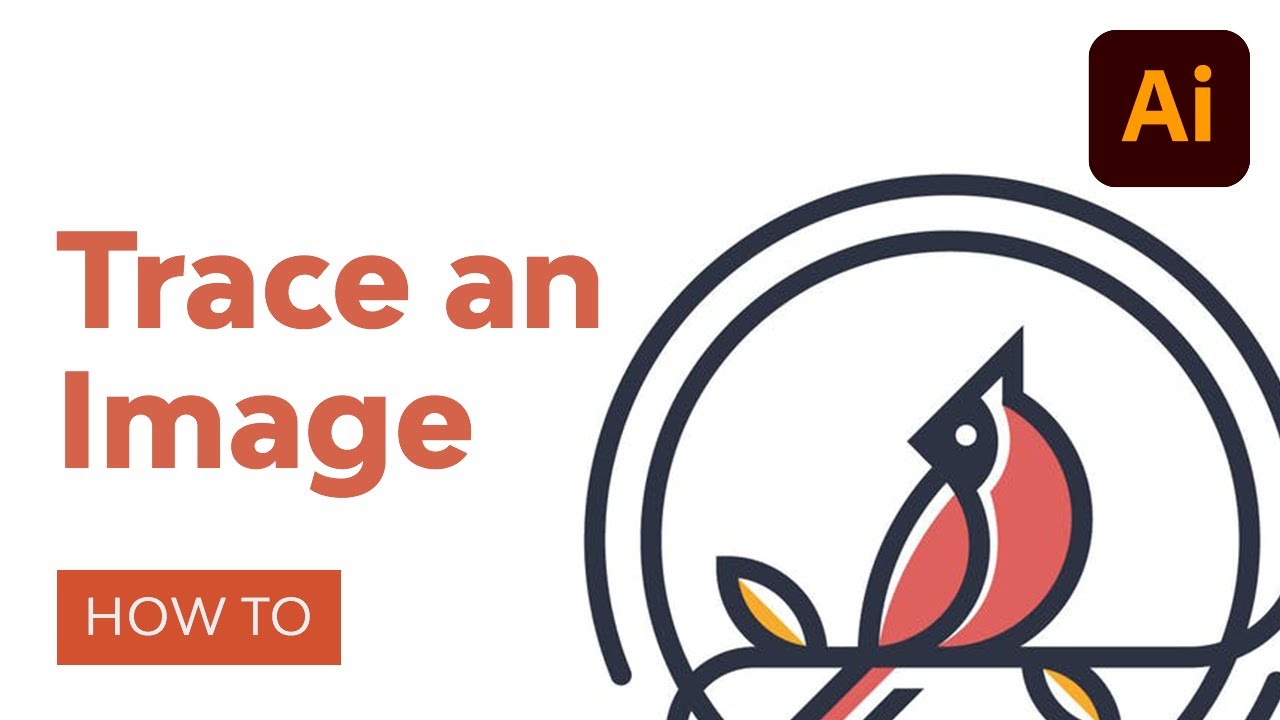
Let’s begin with how to trace an object in Illustrator. To get started with learning how to trace an image in Illustrator, we’ll use this logo. Images with simple forms and shapes like this logo will transfer into the vector format well! We’ll be using a JPG, but you can also use other raster image formats such as PNG and GIF.
We’ll be using the JPG version of this Cardinal Bird Logo from Envato Elements. You can feel free to use any logo or other image too, but I suggest something with simple forms and limited colors, especially if you’ve never used image trace in Illustrator before.
With Illustrator open, go to File > Open to navigate your desktop and open your JPG file. Again, we’re starting with Illustrator trace, image to vector. We’ll trace an image on Illustrator, so start with a simple raster image, like this example file.


Step 2
Now, we have the image open. As this is a raster image, if you try to change the size of the image it can get fuzzy and blurry. We can fix this by converting it to the vector format.
So, where is image trace in Illustrator? First let’s open up the Image Trace window by going to Window > Image Trace.


Step 3
Next, let’s start looking at image trace in Illustrator. With the Image Trace window open, go ahead and click the image to select it. Consider this your trace tool; Illustrator lets us do a lot here.
We will now have access to the options.
Tip: If you don’t have the image selected, the options will be grayed out.


Step 4
From here, we will need to decide how many colors we want our vector image to use. The fewer colors, the lower the file size and the easier the vector artwork will be to work with. In this case, we want to retain the colors and shape of the logo as accurately as possible.
Again, we’re looking at the Adobe Illustrator Image Trace panel. From the Mode dropdown, select Color.


Step 5
The default settings will be fine in this case. Colors set at 30 will be more than enough colors for this image trace in Illustrator.
Go ahead and click Trace on the bottom right of the window.
Note: Depending on your image size and settings, this could be a time-consuming process. One of the best ways to learn how to trace an object in illustrator is to experiment with these settings. Give it a try.


Step 6
There you have it! You now have traced an image using Illustrator. You can now change the size of the image freely without worrying about losing quality. Illustrator auto trace is quick and handy.
In this case, we explored Adobe Illustrator image trace and used it to convert this raster logo into a vector logo.


3. How to Trace a Photo in Illustrator
Step 1
Next, let’s trace a photo in Illustrator. Auto trace can help us with that too.
Tracing a photo in Illustrator is a very similar process, but you will have to keep in mind the limitations of vector. If a photo is converted exactly as it is into a vector format, it would result in an image that is very large in file size and difficult to work with. For this reason, raster image formats such as JPG and PNG are much better suited to using photos. With that being said, we can turn the limitations of the vector format into fun stylistic images which work with the format.
Go ahead and open your photo by going to File > Open to navigate your desktop and open your JPG file. We’ll use this toucan image from Envato Elements.


Step 2
Now our photo is open. Let’s explore how to trace in Illustrator for more advanced and detailed content, like this photo.
Where is image trace in Illustrator? Make sure you have the Image Trace window by going to Window > Image Trace. Remember, this is our trace tool; Illustrator has our options there.


Step 3
With the Image Trace window open, go ahead and click the image to select it. We will now have access to the options.
Tip: If you don’t have the image selected, the options will be grayed out.


Step 4
First, let’s go ahead and convert this to a Black and White vector image.
On the Mode dropdown, select Black and White, and then click Trace on the bottom right.


Step 5
There you go! We converted our photo to a black and white vector image. You can try adjusting other settings to get some interesting results.
Let’s go ahead and make a limited color version of the photo instead. Undo the Image Trace by going to Edit > Undo Image Tracing.


Step 6
Working with color requires a little more creative thinking. We will need to limit the number of colors to create a workable image, but we can also use this to create something that is visually appealing.
From the Mode dropdown, select Color.


Step 7
Make sure that Palette is set to Limited.


Step 8
The number of colors you use will have an important effect on the visual style. I like the look of smaller palette sizes as they will create dramatic highlights and shadows.
Go ahead and select around 20.


Step 9
Now select Trace from the bottom right.
Note: This process might take a while, depending on your settings.


Step 10
There you have it! A visually distinctive vector version of your photo. There are many more settings you can adjust and change. One of the major benefits of this is that not only can you create some visually distinctive versions of your photos, but you can also take advantage of the scalable nature of the vector format.


How to Trace an Image in Illustrator With More Control
If you are looking for more control, you can also trace images using the drawing tools in Illustrator. This is a more time-consuming process, but it also gives you a lot of creative control over your project. This will require extensive use of the Pen Tool. If you’re looking for a crash course in Adobe Illustrator, check out this amazing free Adobe Illustrator course from Envato Tuts+!
Check Out These Logo Designs on Placeit
Looking for logo designs that you can quickly edit yourself? Then check out this collection of Placeit templates you can use.
Check out this sophisticated and sporty logo template! You can customize everything about this logo by following the link!


Check out this arts and crafts logo! It comes with some great starter content to build from. Add your own text and change up the fonts to match your project’s needs.


Check out this graceful logo that would work great for a project that needs an elegant flair! Just follow the link to adjust the text to your own custom needs.


Check out this vintage-inspired template! This custom template can be changed up to suit your needs—just swap out the text or even the background image.


Looking for a sleek logo for a tech company? Then check out this template that offers a great base for creating a custom logo.


What Will You Create With Adobe Illustrator Image Trace?
You can trace a photo or an image in Illustrator. There are plenty of options here. Now that you know how to use image trace in Illustrator, what will you create?
Remember, if you’re looking for a quick and simple tool with tons of options, check out Placeit. It’s an online, browser-based tool, and you can get started right now, for free. Check out Placeit today.
Looking to spruce up your Illustrator skills? Check out these amazing Adobe Illustrator tutorials from Envato Tuts+.