untung99.homes: How to Use Adobe Illustrators Clipping Mask and Compound Path Tools
Untung99 menawarkan beragam permainan yang menarik, termasuk slot online, poker, roulette, blackjack, dan taruhan olahraga langsung. Dengan koleksi permainan yang lengkap dan terus diperbarui, pemain memiliki banyak pilihan untuk menjaga kegembiraan mereka. Selain itu, Untung99 juga menyediakan bonus dan promosi menarik yang meningkatkan peluang kemenangan dan memberikan nilai tambah kepada pemain.
Berikut adalah artikel atau berita tentang Harian untung99.homes dengan judul untung99.homes: How to Use Adobe Illustrators Clipping Mask and Compound Path Tools yang telah tayang di untung99.homes terimakasih telah menyimak. Bila ada masukan atau komplain mengenai artikel berikut silahkan hubungi email kami di koresponden@untung99.homes, Terimakasih.
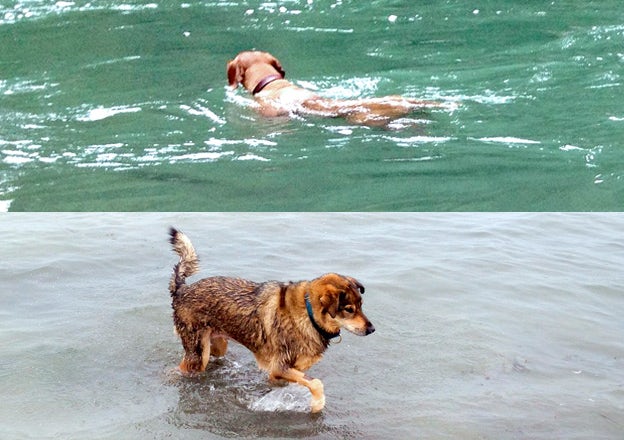
Aloha, designers! Please meet Community Director, Jason Aiken’s sweet and totally-cute dogs, Job and Lily.
Job and Lily have a love for professional swimming and we are going to use one of Illustrator’s brilliant design tools to show off their skills — the clipping mask.
What is a Clipping Mask?
A clipping mask is a shape (called a clipping path) that masks any object below it, so only what’s inside of the clipping path is visible. A clipping path can only be a vector object, not a photo. However, the object below it can be anything – a raster photo, vector drawing, etc.
A few things to note about clipping masks:
- The clipping path must always be on top of the object you’d like to clip.
- You can only have one clipping path.
- However, one or more objects can be clipped.
- Clipped objects must be in the same layer or group.
By now you might be thinking… “What? I’m a visual learner.” Well I am too… so let’s demonstrate.
How to Make a Clipping Mask
In this demo, the clipping path will be the text of their names, Lily and Job. The objects we are going to clip will be images of them swimming. To start, we will do a clipping mask for Job.
A clipping mask can be made in a few different ways:
- Drop down Menu: Object > Clipping Mask > Make
- Shortcut Key: Command > 7
- Layer Panel: Make/Release Clipping Mask icon at the bottom
- Right click: highlight all objects and select Make Clipping Mask
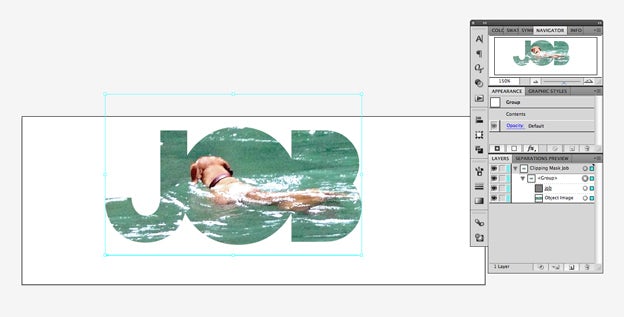
In one layer, I have put Job’s name on top of his swimming photo. You can expand the layer view to see the text and object image separately:

Once the images are properly arranged, click on Object > Clipping Mask > Make. You will notice that everything disappears except what is inside of the clipping path (Job’s name).
Cool and easy, huh?
Using Two or More Clipping Paths
Now, let’s do the same thing for Lily. Lily’s name needs to be altered so that her image fits nicely. When dealing with clipping masks, you will often find that either the clipping path or object underneath needs to be altered to fit together.
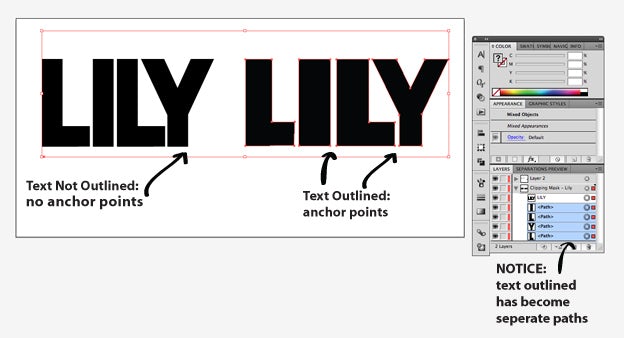
In this case, I want to edit the letters individually. First, I converted the text to outline so each letter can be edited. To convert text to outlines, click on Type > Create Outlines (shift>command>O) or by right clicking on the text and selecting Create Outlines.
Each letter has now become an object that can be edited but not like regular text. You will notice that anchor points appear on each letter — they can be moved and edited individually:
Luckily, compound path allows several paths to be combined into one path. We can convert it to one path by highlighting Lily and selecting Object > Compound Path > Make (Command>8).
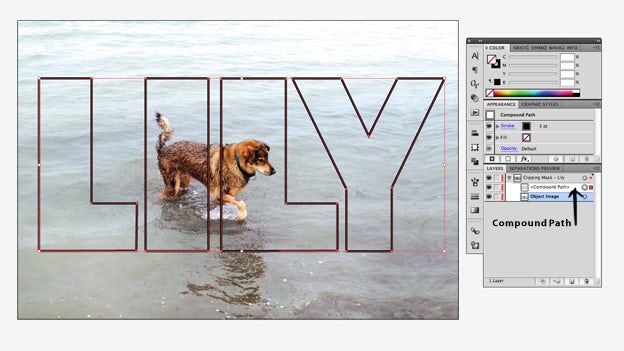
Now, highlight the compound path and photo, then select Object > Clipping Mask > Make:

Compound Paths
As you saw, compound paths combine all selected paths into one. You can also use this tool to make some pretty cool designs quickly.
Play around with it by taking a few basic shapes and stacking them on top of each other. Then select Object > Compound Path > Make (Command>8):

Clipping Two or More Objects
Although, there can not be two or more clipping paths (without making them a compound path), you CAN clip two or more objects underneath.
I’ve made sure the photos of Lily and Job are on the same layer. I’ve also made sure they are placed underneath the clipping path: DOG LOVE.
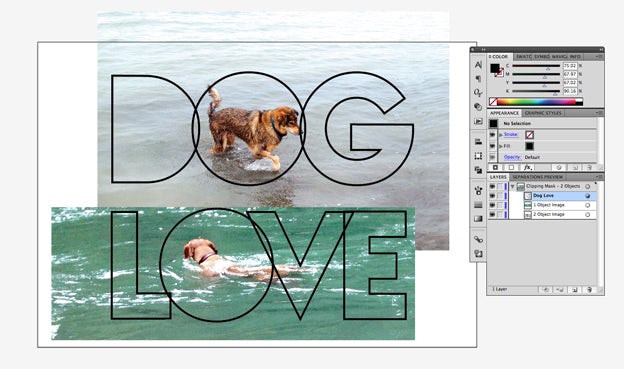
Select Object > Clipping Mask > Make. I’ve made the images more visible by adding a black background.

Release or Edit a Clipping Mask and Compound Path
To release or edit a clipping mask, you can either:
- Select Object > Clipping Mask > Edit/Release
- Or edit by isolating the clipping mask: double click it or find it on the Layers Panel
Release or edit a compound path:
- Select Object > Compound Path > Release
- Or edit by isolating the compound path: double click it or find it on the Layers Panel
As you can see, clipping masks and compound paths are some pretty cool and easy tools that make designing that much more fun.
Thanks to Job and Lily for showing the community just how fun the clipping mask can be:

Make sure to keep an eye on our facebook and twitter@99designs for more Adobe tutorials.